Working with Text as Strings
Agenda
| 15 min. | Sign up for Github and Glitch |
| 30 min. | Demo: MadLibs |
| 15 min. | String Methods |
| 30 min. | Code your own MadLibs |
Objectives
- Run JavaScript code directly in the console and within HTML documents (internally and externally).
- Declare variables and assign them values.
- Concatenate strings and variables.
- Use built-in string methods
- Create a simple MadLibs game.
Sign up for Github and Glitch
Github
Store your code online and share it with others.
We won’t use Github until later in the course, but you’ll use your GitHub username to sign into Glitch (next step).
- Select the free subscription.
- You'll need to verify your email address.
- After signing up, Github will ask you to create your first repository. You can skip this step by just closing the tab.
Once you've created your Github username, send it to me as a direct message in Slack.
Glitch
An online, collaborative code editor and website host
We'll use Glitch to work on class projects together and share them with each other.
Use your GitHub account to sign into Glitch.
- Click the “Sign in” button at the top right corner of the page.
- Select “Sign in with GitHub”.
- Enter your GitHub username and password.
Demo: MadLibs
Let's use what we have learned about variables, alert(), prompt(), and document.write() to build our own MadLibs story.
I've picked the Dragons MadLib because there's this phrase that software engineers use when code is especially tricky, "There be dragons."
I created a new Glitch project to share the code for this exercise with you. Read through the explanation below and follow along with the source code.
Source Code Explanation
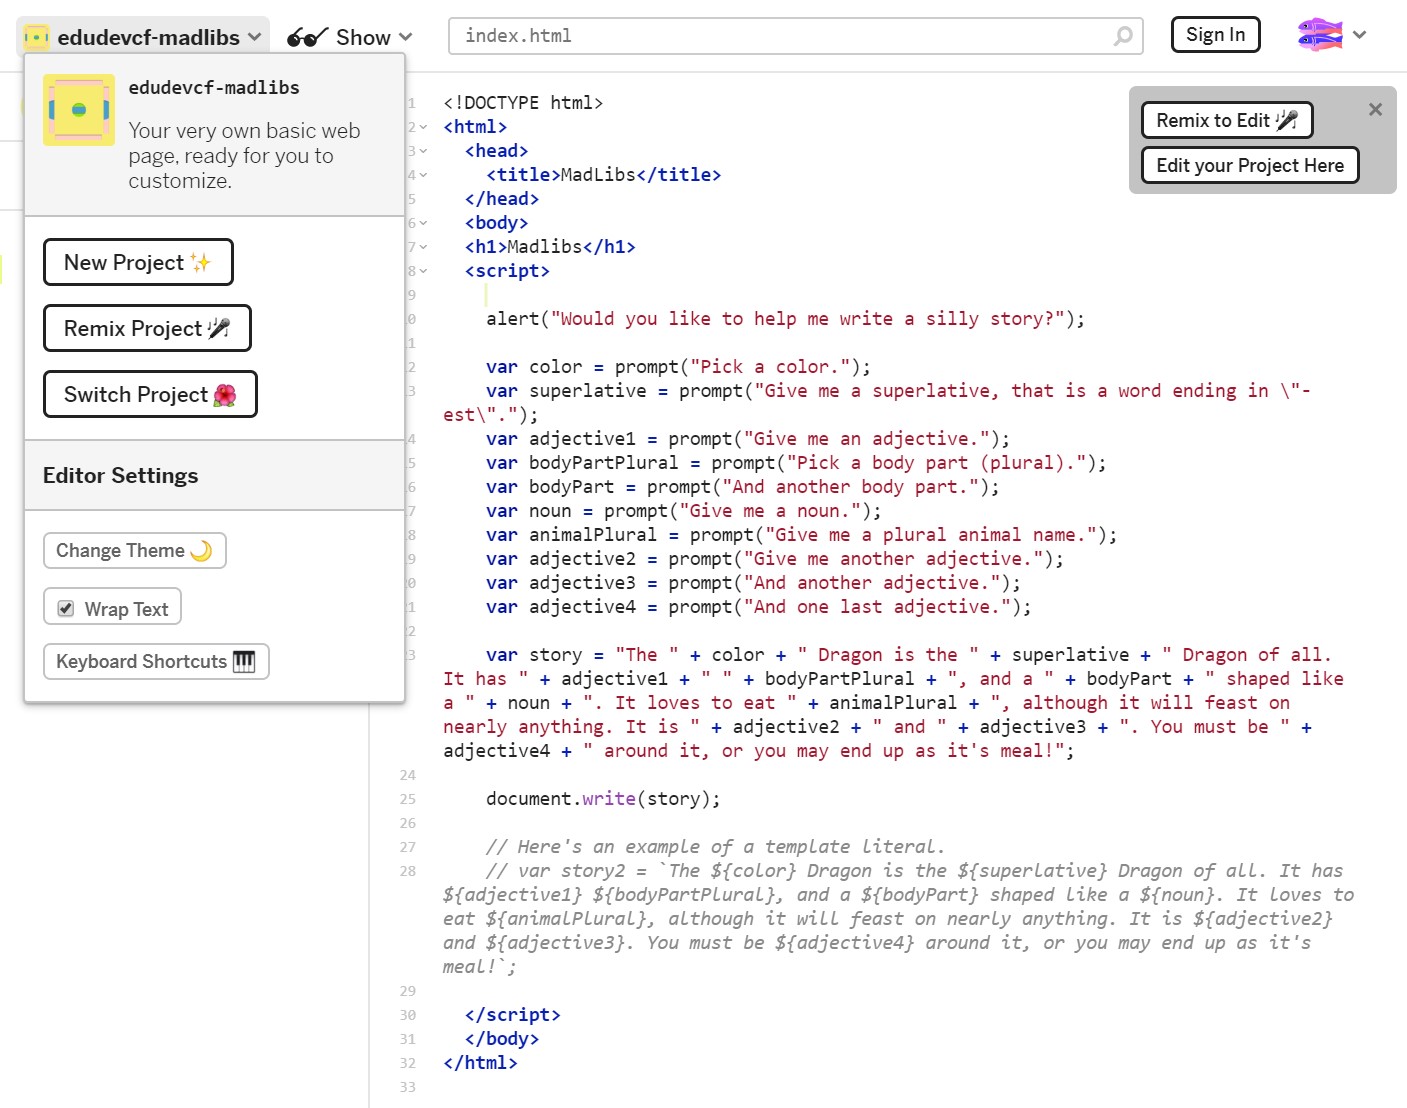
- We're going to write all our JavaScript code between the
<script></script>tags inside the body of an HTML document. (See line 8) - Use the
alert()function to make a pop up that asks the user to help you write a silly story. (See line 10) - Next we need to get 10 words from the user to put into our story. (See line 12-21)
- First, we'll declare variables using the
varkeyword and a unique variable name. - Then we'll set the value of that variable to the results of the
prompt()function. - The input for each
prompt()function should be a string that asks the user for a specific kind of word. - The output will be their response and it will be stored under the variable name you gave it. )
- Then we need to take the text for the story and replace the numbers in brackets with the variable names we have already declared. (See line 23)
"The [1] Dragon is the [2] Dragon of all. It has [3] [4], and a [5] shaped like a [6]. It loves to eat [7], although it will feast on nearly anything. It is [8] and [9]. You must be [10] around it, or you may end up as it's meal!" - First declare a variable, story, and set the value to the text above. Remember to put quotation marks around it to indicate it is a String.
- Now it gets a little tricky. We need to break this long string into several short strings with variables in between and concatenate them together with the plus sign. See example below.
"Story string " + variable + " continued string " + variable ". Next string" + variable + " " + variable + "." - Remember to include spaces and punctuation inside your strings, because JavaScript will not add spaces around your variables for you. You may even need to manually add a space between two variables by creating a string with only a space inside the quotation marks:
variable + " " + variable. - You may need to refresh the page and run your code multiple times to catch any typos until the text is formatted correctly.
- Another way to concatenate strings and variables without adding them together is to use template literals. There is an example of line 28. It is commented out with backslashes, so the code won't actually run. It's just there as extra information for you, the programmer. Here's a helpful blog post that explains more about template literals in JavaScript.
- Finally, we display the story as text on the webpage by passing the
storyvariable into thedocument.write()function. Since we are passing in a variable, you shouldn't put quotes around it. (See line 25)
Wrap Text
When viewing the code in Glitch, you may notice that the story string goes on as one very long line. That makes it hard to read the entire string, but you can turn on the Wrap Text setting by:
- Clicking on the project name,
edudevcf-madlibs. - Making sure the Wrap Text setting is checked.
Checking Variables in the Console
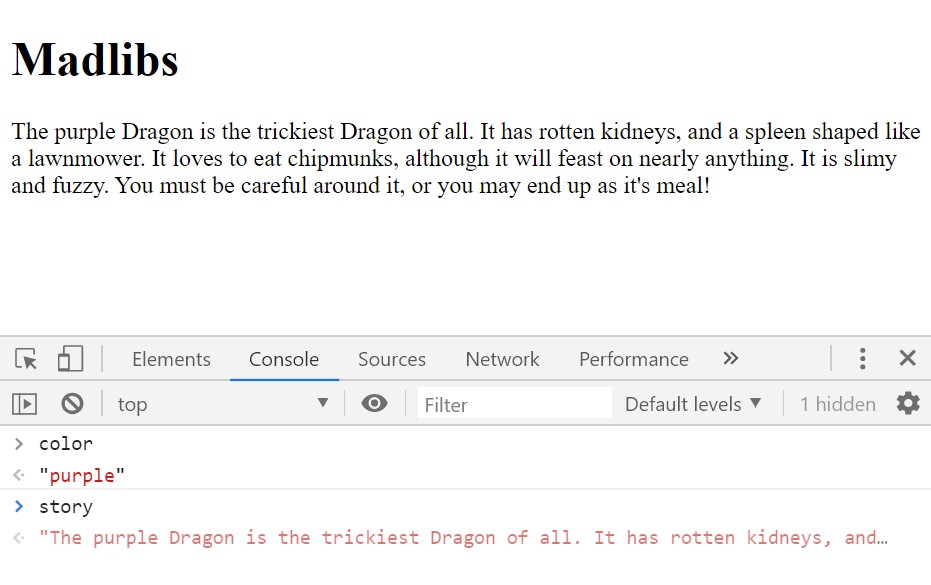
Since we aren't displaying our story text until the end of our code, you may want to have the console open in your browser to see how the variables are being stored as you respond to the prompts.
- Open your Glitch project or HTML file in a new window in Chrome.
- Open up the developer tools using the keyboard shortcut CTRL + Shift + i.
- Click on the Console tab, which is right next to the Elements tab.
- Now you can type in the name of a variable and see that value that has been assigned to it.
- Note: You may not be able call the variables until all the pop up windows have been closed.
Doing more with strings
String Methods
Here are a few built-in methods that can be used on strings.
.toUpperCase().toLowerCase().trim()
Learn about more string methods at w3schools.com.
Template literals
Read about template literals and how you can use them to insert variables into a string and make multi-line strings.
Exercise: Make your own MadLib
Use the source code from the demo as a starting point to creat your own MadLibs. You can remix the project in Glitch, or work off-line in a code editor like Visual Studio Code or even Notepad. Remember to save your file with a .html extension and then open it in a browser to run your code.
You can pick from the examples below or write your own story. But some of them are quite long, so I'd recommend use only part of them so that you have no more than 10 variables in your story.
Examples from MadTakes.com